

Being reasonably new to serious cooking, I’ve only just come across the tagine, and had no idea which kind to buy. Glazed vs Unglazed Tagine became a question I wanted to find out the answer to. Which is best and why? I’ve done some research and compiled what I found to help anyone else needing the same question answered.
So Glazed vs Unglazed tagine. What is the difference and which one should I buy? Tagines suitable for cooking are usually made of raw clay. Glazed tagines are ready to cook with and easier to clean. Unglazed tagines will need to be seasoned before use in order to strengthen and remove some of the raw clay taste. Some glazed tagines are ceramic and are not suitable for cooking.
The above answer is the short and simple one to the question of glazed vs unglazed tagine and what are the major differences.
I’ve gone into more detail below about these differences. I’ve also added some information about how to season your tagine for first use. Also you will find information about how to clean and cook with your tagine below. I hope you find this useful.
Glazed vs Unglazed Tagine – Which one should I buy?
The answer to the above question, and whether you should buy a glazed or unglazed tagine is really down to personal preference.
I would say that buying a glazed tagine is probably going to be better for those new to cooking. This is not a hard and fast rule though. It may well be that you want to give this a try, and the instructions in this post will show you how to do this.
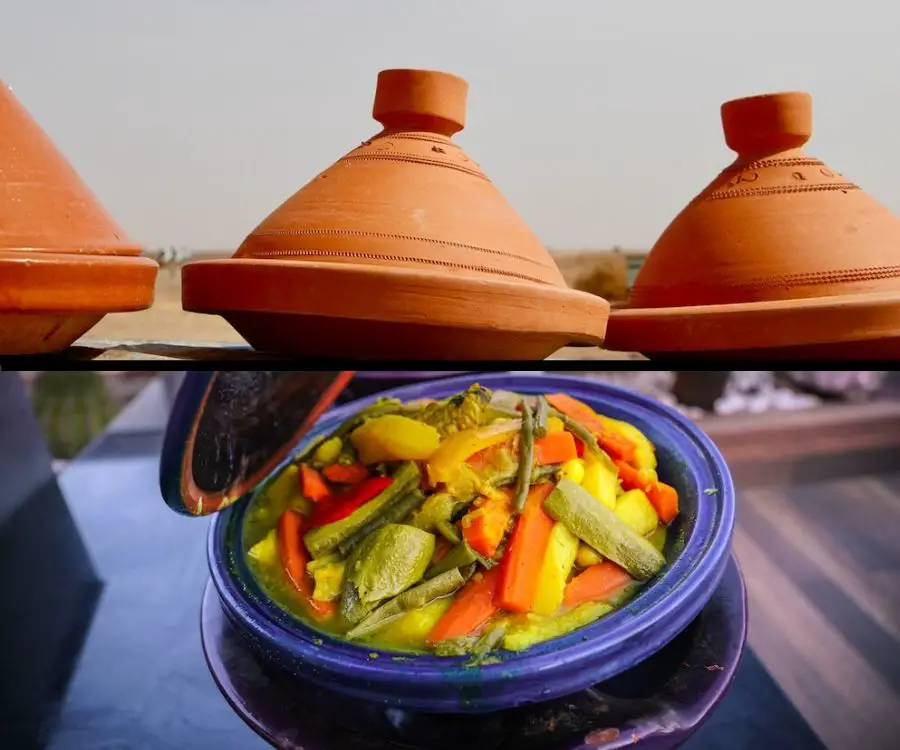
A glazed tagine will be shiny and possibly decorated with patterns like below:

This tagine is going to look better for sure. However if you are serious about cooking, this is probably not your main concern.
An unglazed tagine is made of raw clay, and will look like the picture below:

While this may not look as attractive, many people prefer the experience of cooking with this type of tagine.
There are some things to be aware of when buying both a glazed and an unglazed tagine. First off, if buying a glazed tagine, you need to check very carefully with the retailer.
Many tagines are designed made to be decorative pieces. These are not suitable for cooking. Check with the retailer to make sure it is meant for cooking with. I’ve read stories of people cooking with glazed tagines only to find the glaze peeling off and going into their food.
Make sure what you buy is very definitely glazed clay, and not ceramic. A ceramic tagine will not be able to take the heat of either the stovetop or the oven when cooking.
If you are buying an unglazed tagine, again there are things to be aware of. Unless expressly directed by the retailer, your tagine will more than likely not be ready to cook with. You will need to season this before first use. I have added instructions below to show you how to do this.
Although again down to personal taste, popular opinion is that an unglazed tagine is going to give you the best cooking experience.
Once seasoned properly, an unglazed tagine is going to add an earthy feel and taste to the foods you cook.
For me, I would go with the unglazed tagine. The extra preparation time required for this is going to be worth it when you cook your first meal.
Also, this type of tagine improves over time. Cooking more and more with your tagine will allow for the taste of your food to develop if looked after properly.
What is a Tagine?
Those new to cooking, or wanting to try new experiences and cooking appliances may not know what a tagine is.
A tagine is a Moroccan cooking vessel. It originated hundreds of years ago in North Africa. During this time nomads used the tagine as a sort of portable oven.
These trailblazer nomads had actually invented a very early version of cookware similar to a dutch oven or slow cooker.
They would have placed their tagine on top of an open fire, and slow cooked their favorite recipes.
Interestingly, recipes or foods cooked in a tagine are also known as tagines.
Tagines suitable for cooking with are made out of raw clay and can be glazed or unglazed.
Decorative ceramic versions of tagines can also be bought, but should not be used for cooking.
Retailers are now making tagines out of other materials too. It is possible to buy aluminium tagines, and also cast iron versions too.

The base of a tagine is wide and shallow. It has a conical lid which both retains steam and allows steam to be retuned to what is being cooked.
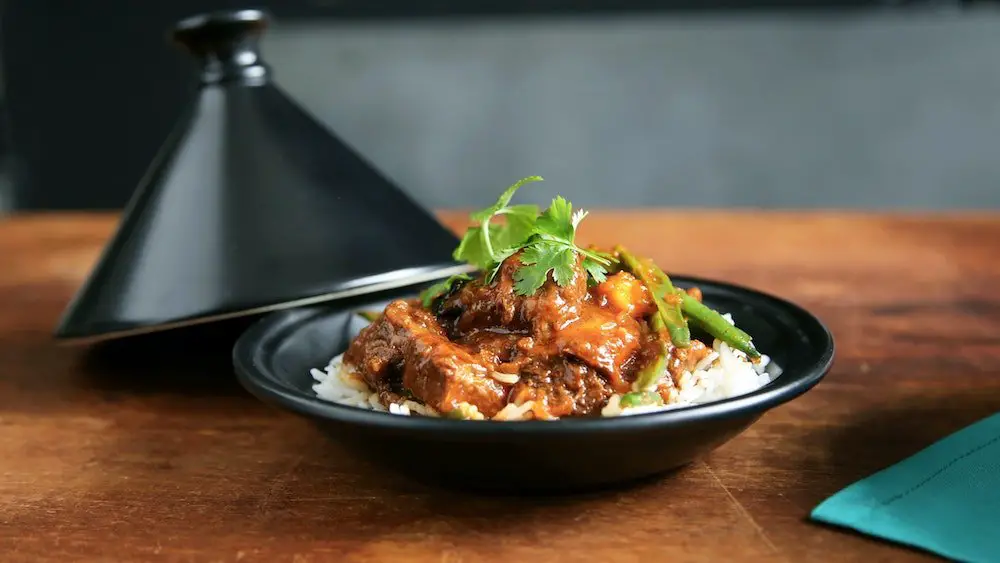
Food cooked in tagines usually consists of layers of vegetables, meat, spices, oil and water.
One of the great things about a tagine is that you can use it as a serving dish once your food is cooked. It looks great, and there is no need for a separate serving dish, saving on washing up!
How Does a Tagine work?
Cooking with a tagine can either take place on a stovetop or in your oven. You should cook food slowly and at an even heat in your tagine over a long period.
The tagine works similar to a slow cooker or dutch oven, in that the conical lid traps steam inside. This maintains steam in the food, and allows the food to be cooked in a moist environment.
The result of this is slow cooked food packed full of moisture. You should find that meats cook really tenderly inside the tagine.
If you are using a tagine on an electric stovetop, it is very important that it should not touch the surface. You must raise your tagine off the surface, by placing a heat defuser underneath it.

Using a tagine at too high a temperature will led to a kind of thermal shock. This will result in the tagine cracking, making it unusable.
You should cook food at low temperatures for long periods. Allow the food to slowly simmer and then leaving for 2 to 3 hours depending on the recipe is the best way to use your tagine.
How to Season an Unglazed Tagine Before First Use
In most cases you will need to season an unglazed tagine before first use. Check with your retailer to see if it has been seasoned. Even if they say it has been, I would probably still follow the below instructions.
Seasoning an unglazed tagine is a must for two main reasons:
- Seasoning your tagine will strengthen it. This ensures your tagine lasts much longer.
- Doing this will also eliminate the excess raw clay taste that comes with an unglazed tagine.
Follow the below instructions to make sure your unglazed tagine is ready for its first outing in your kitchen:
- Soak both the tagine and lid in water for several hours. You should soak for a minimum of two hours, but I would leave to soak overnight.
- Coat the bottom of the tagine with olive oil and also around the surface where the cone sits.
- Add warm water to the tagine and let it sit for around 24 hours.
- Empty the water out of the tagine and allow it to air dry.
- Fill the bottom of the tagine with salt water.
- Place in a cold oven and allow the oven to heat to 250 F.
- Leave the tagine in the oven for around an hour.
- Turn oven off and allow the tagine to cool inside the oven.
- Once completely cooled, coat the tagine again with olive oil.
- You can now either use the tagine or store it away.
Cleaning a Tagine
There is a difference in cleaning a glazed vs unglazed tagine. You can clean a glazed tagine with soap and water. The glaze on this type of tagine will protect the clay from the soap.
However, this is not the case for an unglazed tagine, and you should not clean an unglazed tagine with soapy water. The soap will become stuck in the clay. There is no way of avoiding this, and it will leave your food tasting of soap the next time you use it.
One of the best things about an unglazed tagine is how it matures with every use. The cleaning of your tagine with soap will not only stop this, but will spoil future cooking attempts.
The below instructions will prevent this from happening, and leave you with a tagine that always cooks your food perfectly:
- Use warm slighly salted water to clean down the inside and outside of your tagine.
- Leave the tagine to air dry on a drainer.
- Once dried, coat the tagine with olive oil.
- Store with lid slightly ajar to prevent mold from developing inside the tagine.
Cooking with a Tagine
There are tons of amazing recipes readily available on the internet if you are interested in getting started today. Below is just a rough guide to what to expect when cooking with a tagine.
- When cooking, either on the stovetop or in the oven, cook over longer periods at a lower heat.
- Don’t exceed temperatures of 160 C or 350 F.
- Avoid rapid changes of heat. Don’t add cold foods to an already hot tagine. This will lead to cracking and render your tagine unusable.
- Place a vegetable such as chopped up onions on the base of the tagine. This will serve to stop meats from sticking to the base.
- If adding garlic to your dish, place chopped garlic directly on top of the onions. This will permeate your foods during cooking.
- At this point add olive oil. Be generous here. I would suggest adding 1/3 or 1/4 of a cup. You should take direction from your recipe. This will add to the sauce.
- Place your meat on top of the onions (or other vegetable base) and chopped up garlic.
- You can spread this across the whole base layer, or put together in the centre.
- Doing this will allow you to place other vegetables around this layer of meat.
- Season the meat and onions with whatever Moroccan spices you desire.
- You can place other seasoned vegetables either around or on top of the layer of meat.
- Next you will want to add water to the tagine contents. This is very important to allow your food to retain moisture whilst cooking.
- Gently pour water down the side of the contents of the tagine. Be careful not so allow this water to wash the spices down into the base with it.
- Add the amount of water directed by your recipe.
- Place tagine on stovetop on a medium heat (using diffuser if needed).
- Allow food to slowly come to simmer.
- Once simmering, leave to stew on stovetop or transfer to oven and follow directed cooking tie. You can expect this to be 2 – 3 hours.
- Check liquid levels regularly. You may need to add more water throughout.
- Serve food directly from the tagine.
Conclusion
I hope the above post has given you an insight into the difference between glazed vs unglazed tagine.
If you are looking for an attractive tagine ready to cook with, you can go for a glazed tagine. This will not only look great, but will be ready to cook with. It is also easier to clean, as you can use warm soapy water quickly and easily.
If you are felling a little more adventurous, and don’t mind putting in some extra work, go for an unglazed tagine. Whilst you will have to prepare this by seasoning, it will give a more authentic cooking experience and taste to your food.
Drop me a comment below to let me know your thoughts on which you prefer!
